
The content is in, the deadline is set and the document is blank. It is tempting to skip planning and start building, because building feels like progress. Then the first review comes back with forty comments, half of them about things you could have agreed in a table weeks ago. What does an e-learning storyboard need so that it survives review by subject-matter experts and stakeholders?
Storyboard an e-learning course by writing every screen as a row in a simple table: what the learner sees, what they hear, what they do and what happens next. Start each storyboard by stating the learning objectives, so every reviewer can judge screens against the same goals. Use a text-based storyboard for most courses and add visual mockups or a quick prototype only where layout or interaction is hard to describe. Treat the finished e-learning storyboard as an agreement: once it is signed off, changes after that point are new requests, not fixes.
What Does an E-Learning Storyboard Need to Include?
An e-learning storyboard needs enough detail that a developer could build each screen without guessing and a reviewer could approve it without seeing it built. That usually means one row per screen with a handful of consistent columns. Fancy templates are optional. Consistency is not.
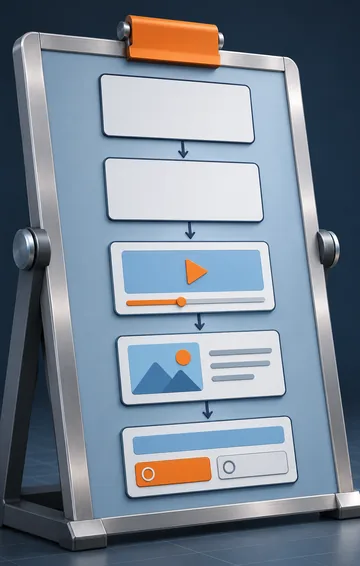
Here is a set of columns that works for most projects:
| Column | What goes in it |
|---|---|
| Screen ID | A short code such as M1-S04, so comments can point at one screen |
| Objective | Which learning objective this screen supports |
| On-screen text | The exact words learners will read |
| Narration | The exact script, if there is audio |
| Visuals | A description of images, diagrams or animation |
| Interaction | What the learner does and what happens in response |
| Notes | Developer notes, alt text, open questions |
How much detail is enough? A useful test is the "absent designer" check. If you were out sick for a week, could a developer build the screen from the row alone, and could a reviewer tell whether it is right? If either would have to message you, the row needs another sentence. If the row describes font sizes and button colors, it probably has too much detail, and those decisions belong in a style guide instead.
Above the table, put a short header: the audience, the objectives, the estimated length and any constraints like "must work on a phone." Writing the objectives first matters more than any column. Michigan Tech's guide to writing observable, measurable learning objectives is a helpful reference, because objectives built on action verbs give your reviewers something concrete to measure each screen against.
Text-Based or Visual Storyboard: Which Should You Use?
Use a text-based storyboard for most courses, and switch to a visual one when the layout itself carries meaning. A text-based storyboard is a table in a word processor or spreadsheet. It is fast to write, easy to comment on and easy to change, which is exactly what you need while the content is still moving.
A visual storyboard adds sketches or mockups of each screen, often in slides. It takes longer, but it helps when reviewers struggle to imagine a screen from words alone, or when the visual layout is the lesson, such as a software simulation or an equipment diagram.
A practical middle path works well for many teams. Write the whole course as a text storyboard, then mock up just three or four representative screens visually: a content screen, an interaction, a quiz screen and the opening. Reviewers see the look once and can picture the rest.
How Do You Write Narration and On-Screen Text Separately?
Write narration and on-screen text as two different jobs, because learners cannot read one paragraph while hearing a different one. The usual pattern is that narration carries the explanation and on-screen text carries the key points or labels. If both say the same long sentence word for word, learners tend to read ahead and stop listening.
Say a learner is looking at a screen about the three steps for reporting a near miss. The narration explains each step in a friendly, conversational way. The screen shows three short labels and a simple diagram that highlights each step as the narrator reaches it. The two work together instead of competing.
A few habits keep scripts in good shape:
- Read every line of narration aloud before you send the storyboard. If you stumble, the voice talent will too.
- Write numbers and acronyms the way they should be spoken, and spell out acronyms the first time.
- Plan captions and transcripts from the start. The W3C guide to making audio and video media accessible covers captions, transcripts and audio description, and it is much easier to plan for them in the storyboard than to bolt them on later.
How Do You Show Interactions on Paper?
You show an interaction on paper by describing the starting state, every action the learner can take, and the result of each action. Vague notes like "drag and drop activity here" invite trouble, because the reviewer pictures one thing and the developer builds another.
Compare a clearer note for a made-up activity: "Learner sees five sample expense items and two bins, Approve and Reject. Learner drags each item to a bin. When all five are placed, a Check button appears. Correct placements show a green outline. Incorrect ones show a short reason, for example: 'Rejected: no receipt attached.' Learner can try again once." Anyone reading that knows what to build and what to review.
For feedback, write the actual words, not "feedback for incorrect answer." Feedback is content, and it deserves the same review as everything else. For anything with branches, add a small diagram or a list of screen IDs showing where each choice leads.
When Should a Storyboard Become a Prototype?
A storyboard should become a prototype when an interaction is new, complex or risky enough that people need to try it rather than read about it. A clickable sample of one tricky interaction can settle questions in ten minutes that a written description would leave open for weeks.
Good reasons to prototype:
- The interaction is a type your team has not built before.
- Stakeholders disagree about how something should feel or flow.
- Timing matters, such as narration synced with animation.
- You need to confirm it works on a phone or with a keyboard.
Keep prototypes small and rough. Plain shapes and placeholder text are fine. The point is to test the idea, not to polish a screen that may change.
How Do You Get the Storyboard Signed Off?
You get a storyboard signed off by making review easy, focused and final. Send it with a short cover note that says what you want reviewers to check (accuracy and completeness, not fonts), how to comment (by screen ID), and the date you need comments back. Then name one person who has the final say when two reviewers disagree.
Plan for a set number of review rounds and say so up front. Two is a common, reasonable plan: one full review, one check that the changes were made correctly. When the last round is done, ask for a clear sign-off in writing, even if it is a one-line reply.
Version control keeps sign-off meaningful. Save each round as a new file with the date or a round number in the name, keep a short change log at the top, and never edit a signed version in place. When someone asks later why a screen says what it says, you can show which round introduced the change and who asked for it. That record protects you and your reviewers equally.
Sign-off is a relationship moment as much as a process step. If your reviewers feel rushed or ignored, they will find their changes later, during development, when changes cost more. Building that trust starts at the first meeting, and there is a separate guide to working with subject-matter experts that covers how.
A Good Storyboard Is the Argument You Win Before Development Starts
An e-learning storyboard is where you settle the hard questions while they are still cheap to answer: what the course teaches, what each screen says, what learners do and what happens when they do it. A simple table with consistent columns, clear objectives at the top and real feedback text is enough for most projects.
Keep visuals and prototypes for the places they genuinely help, make review focused, and get a written sign-off. When a late change request arrives, and one always does, you can point to the agreed screen and have a calm conversation about scope. That is the real job of a storyboard, and it is why the time you spend on it comes back to you many times over.